Write a project page
In this page, you'll see most of the aspect about writing a project page, don't hesitate to take time to read this page and come back several time.
How to introduce your project?
The most important thing about your project is its introduction. This comes with several things:
- The title of the project: It should not be confusing and give clue about the plot of the project
- The cover image of the project: This is the first thing people will see, make sure you give a good looking cover image for your project.
- The introduction section: This section explains your main motivations for your project.
How to define the cover image
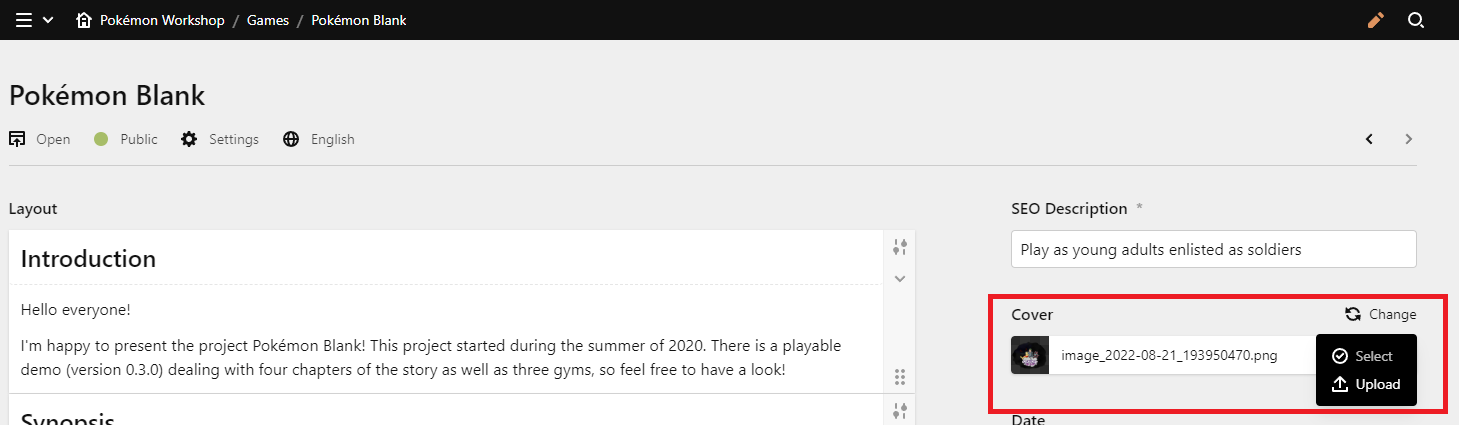
The cover image is one of the first thing people might see about your project. Either when you share the project page in social network (this will be the picture tied to the link), or when opening the project page.
The cover image must be a 16:9 image. You're allowed to use transparency and highly recommanded to have an image with a width that is at least 1120px wide.
The cover image can be set in the page fields on the right of the page:
How to write the introduction section
The best way to write the introduction section is writing a quote of you explaining your motives of creating the project you created. The goal is to catch the attention of your potential audience (player or maker, you don't have to make a game that is aim to be played by a lot!)
Here's a basic example:
Giving information about your project
A tipycal project page looks like this:
- Synopsis: short text about the story (10 lines max).
- Characters: Description of few characters mentionned in the synopsis
- Region: Description of the region(s) the player will play in
- Features: List of features available in that project (absolutely not necessary to be honest).
- Links: Few links about the project, download link if available but also social network or Discord server for internal communication & help!
- Credits: Mandatory section that should always be last (will be explained in another chapter below).
Putting aside the credits section, all of the typical sections are optional, they aim to help you describe the game in a structured way so people searching about information of your project can find them easilly.
Note that you should write your project page in text with pictures and not with pictures only. Page without text is bad for both SEO and people reading the project page. People cannot search and those who has trouble to read will get even more troubles with pictures!
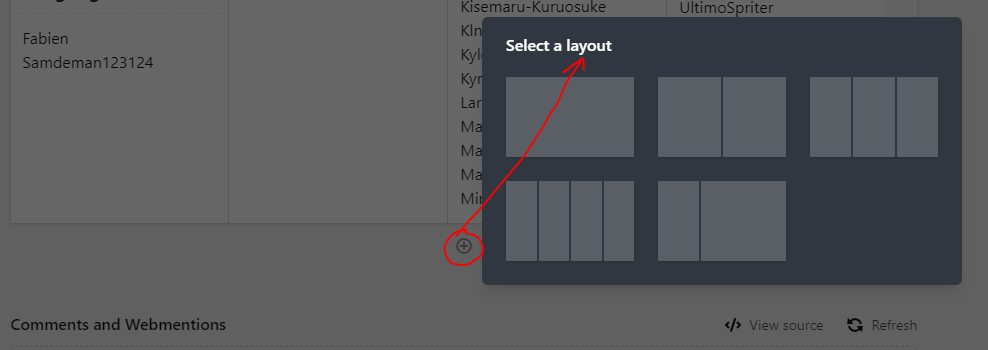
You're welcomed to use the layouts to improve how the content is rendered in wide screens:
Don't also hesitate to put pictures showing stuff from your project. Adding a legend to the picture is very welcomed.
It's also a good idea looking for other project pages to see how things are done. Just take in account that not all of them are the best. If you hesitate, ask in the Pokémon Workshop Discord, we can help a bit!
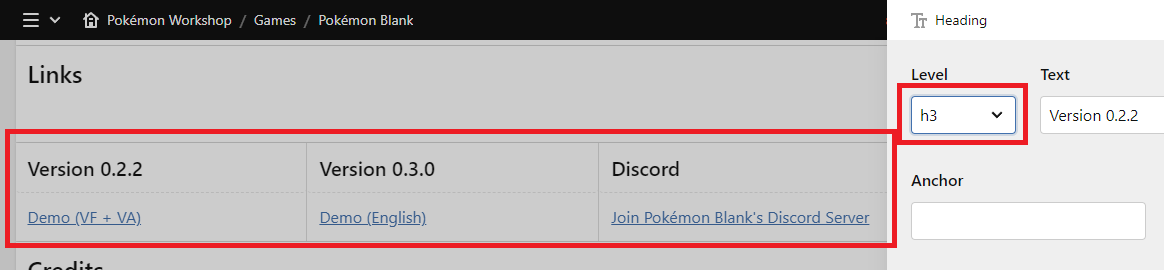
Providing links
It's often a good idea to provide links about the project. The best way to do it is using layouts with subtitle:
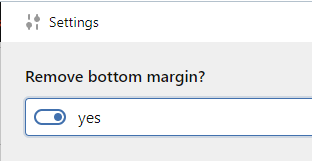
Since you have to break the layout between the links title and the list of links, you should tick the remove margins box of the previous layout settings:
Note that linking works both way, you should add a link to the project page in your social networks to ensure people get a good description of your project and also see other links.
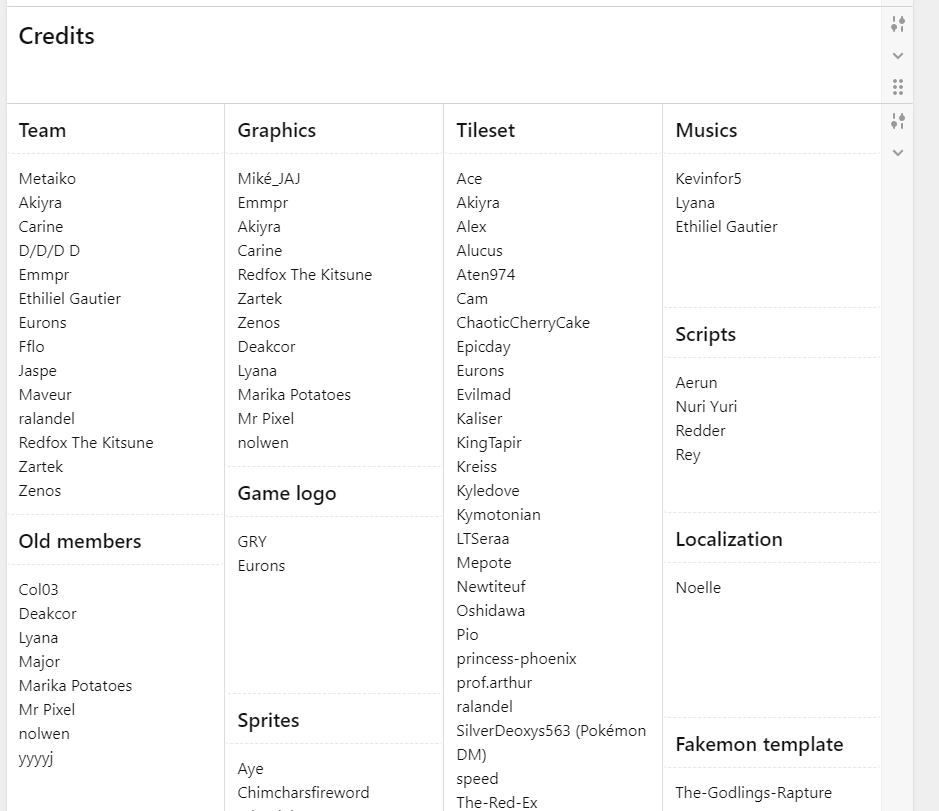
Write the credits
The credits in your project page should only be about the people who contributed directely or indrectly in your project. For example, those who made free sprites that you use. The best way to display the credits is using a 1/4 layout. You should always partition the credit this way: Kind of resource/role -> Person who did those kind of resource
Here's one of the best example:
In the credit there's one big exception. You should not enter the credits of the Starter Kit you're using. Those starter kit must maintain a credit page on their website so it's easier for all of us to focus on things that are really important.
Pokémon Workshop make sure to link the credits of the engine to all the project page using the appropriate tags. For PSDK games, use the PSDK tags and a link to the PSDK credits will be added at the end of the presentation:

Please, note that Pokémon Workshop is not aware of all the game engine used by fangames. If you want to have this credit linking for another engine, contact us and we'll improve the linking to make sure it appears!
Getting live
You might have seen that by default your project page is set as "Draft" and you can't change it. This ensures that we can validate the initial project page. Once you're done with writing the project page, tell us and we'll validate it or give you a list of points to fix!
Don't forget about translating the project page in other languages. Pokémon Workshop is a multi-language & multi-cultural website. If you can't translate, it's no big deal, a redirection link in other locales can do the job. (Note that Deepl is very helpful).